DAS Web Chromecast App Development
This page describes how to integrate a Chromecast device with DAS. Any intermediary gateways or proxies have been omitted for simplicity.
The sample application shows how the sender/receiver work in the context of Chromecast, in conjunction with calls to the DAS service on the SSP backend.
Application registration
The first step is to register the application.
The registration process requires a Gmail account and currently costs $5 (US).
A complete description is available on Google's official registration page.
Once registered, on the SDK console page, click Add New Application.
You must provide the details of the application, such as its name, URL (the page that will be displayed on casting), etc.
Once you have saved this page, the details will be visible on the dashboard.
To test the application, the device must be registered.
Click Add New Device on the Google Cast SDK Development Console and follow through.
Keep the serial number of the device handy.
Chromecast library integration
Throughout this page, das_sender.js acts as the sender, and dasWebClient.js acts as the receiver. Your application must reference some Google-provided Chromecast libraries.
Javascript Chromecast libraries
Sender (referenced by das_sender.js):
JS<script src="https://www.gstatic.com/cv/js/sender/v1/cast_sender.js?loadCastFramework=1"></script>Receiver (referenced by dasWebClient.js):
JS<script type="text/javascript" src="//www.gstatic.com/cast/sdk/libs/caf_receiver/v3/cast_receiver_framework.js"></script>
Minimal code
The following code snippets provide the minimum functionality required on both ends (sender/receiver).
The following snippet (found in das_sender.js) is for cast API initialization.
JSwindow['__onGCastApiAvailable'] = function(isAvailable) { if (isAvailable) { initializeCastApi(); } } initializeCastApi = function() { cast.framework.CastContext.getInstance().setOptions({ receiverApplicationId: "8898F99A", //Registered application's id autoJoinPolicy: chrome.cast.AutoJoinPolicy.ORIGIN_SCOPED }); };The following snippet (found in das_sender.js) is to send data to the Chromecast receiver.
JSfunction sendMessage(elementId, message){ const CUSTOM_CHANNEL = 'urn:x-cast:com.nagra.dasweb'; // NAMESPACE can be any string starting with "urn:x-cast:" that acts as a channel to can send and receive information on. var castSession = cast.framework.CastContext.getInstance().getCurrentSession(); if(castSession){ castSession.sendMessage(CUSTOM_CHANNEL, { id: elementId, text: message }); } }The following snippet (found in dasWebClient.js) is to start the receiver.
JSconst CUSTOM_CHANNEL = 'urn:x-cast:com.nagra.dasweb'; const context = cast.framework.CastReceiverContext.getInstance(); context.addCustomMessageListener(CUSTOM_CHANNEL, function(customEvent) { // application specific code }); context.start();
For more information about the sender/receiver APIs, see Google's official page.
Reference das-web-client app details
NAGRA's reference Chromecast DAS client app includes the different files
File | Link to Example | Notes |
|---|---|---|
sender.html | The HTML page to be cast. This page has three input fields: auth token, opvault_url and base_url; the values used for the DAS Web SDK client can be used for these. | |
das_sender.js | The JS contains the cast API initialization and | |
dasWebClient.html | The HTML page that loads in the Chromecast device. | |
dasWebClient.js | The JS contains the code that starts the receiver and listens to the sender's incoming messages. |
Validation
Cast the sender web page from the browser to the TV. Observe that our receiver/application name is displayed on the Cast pop-up.

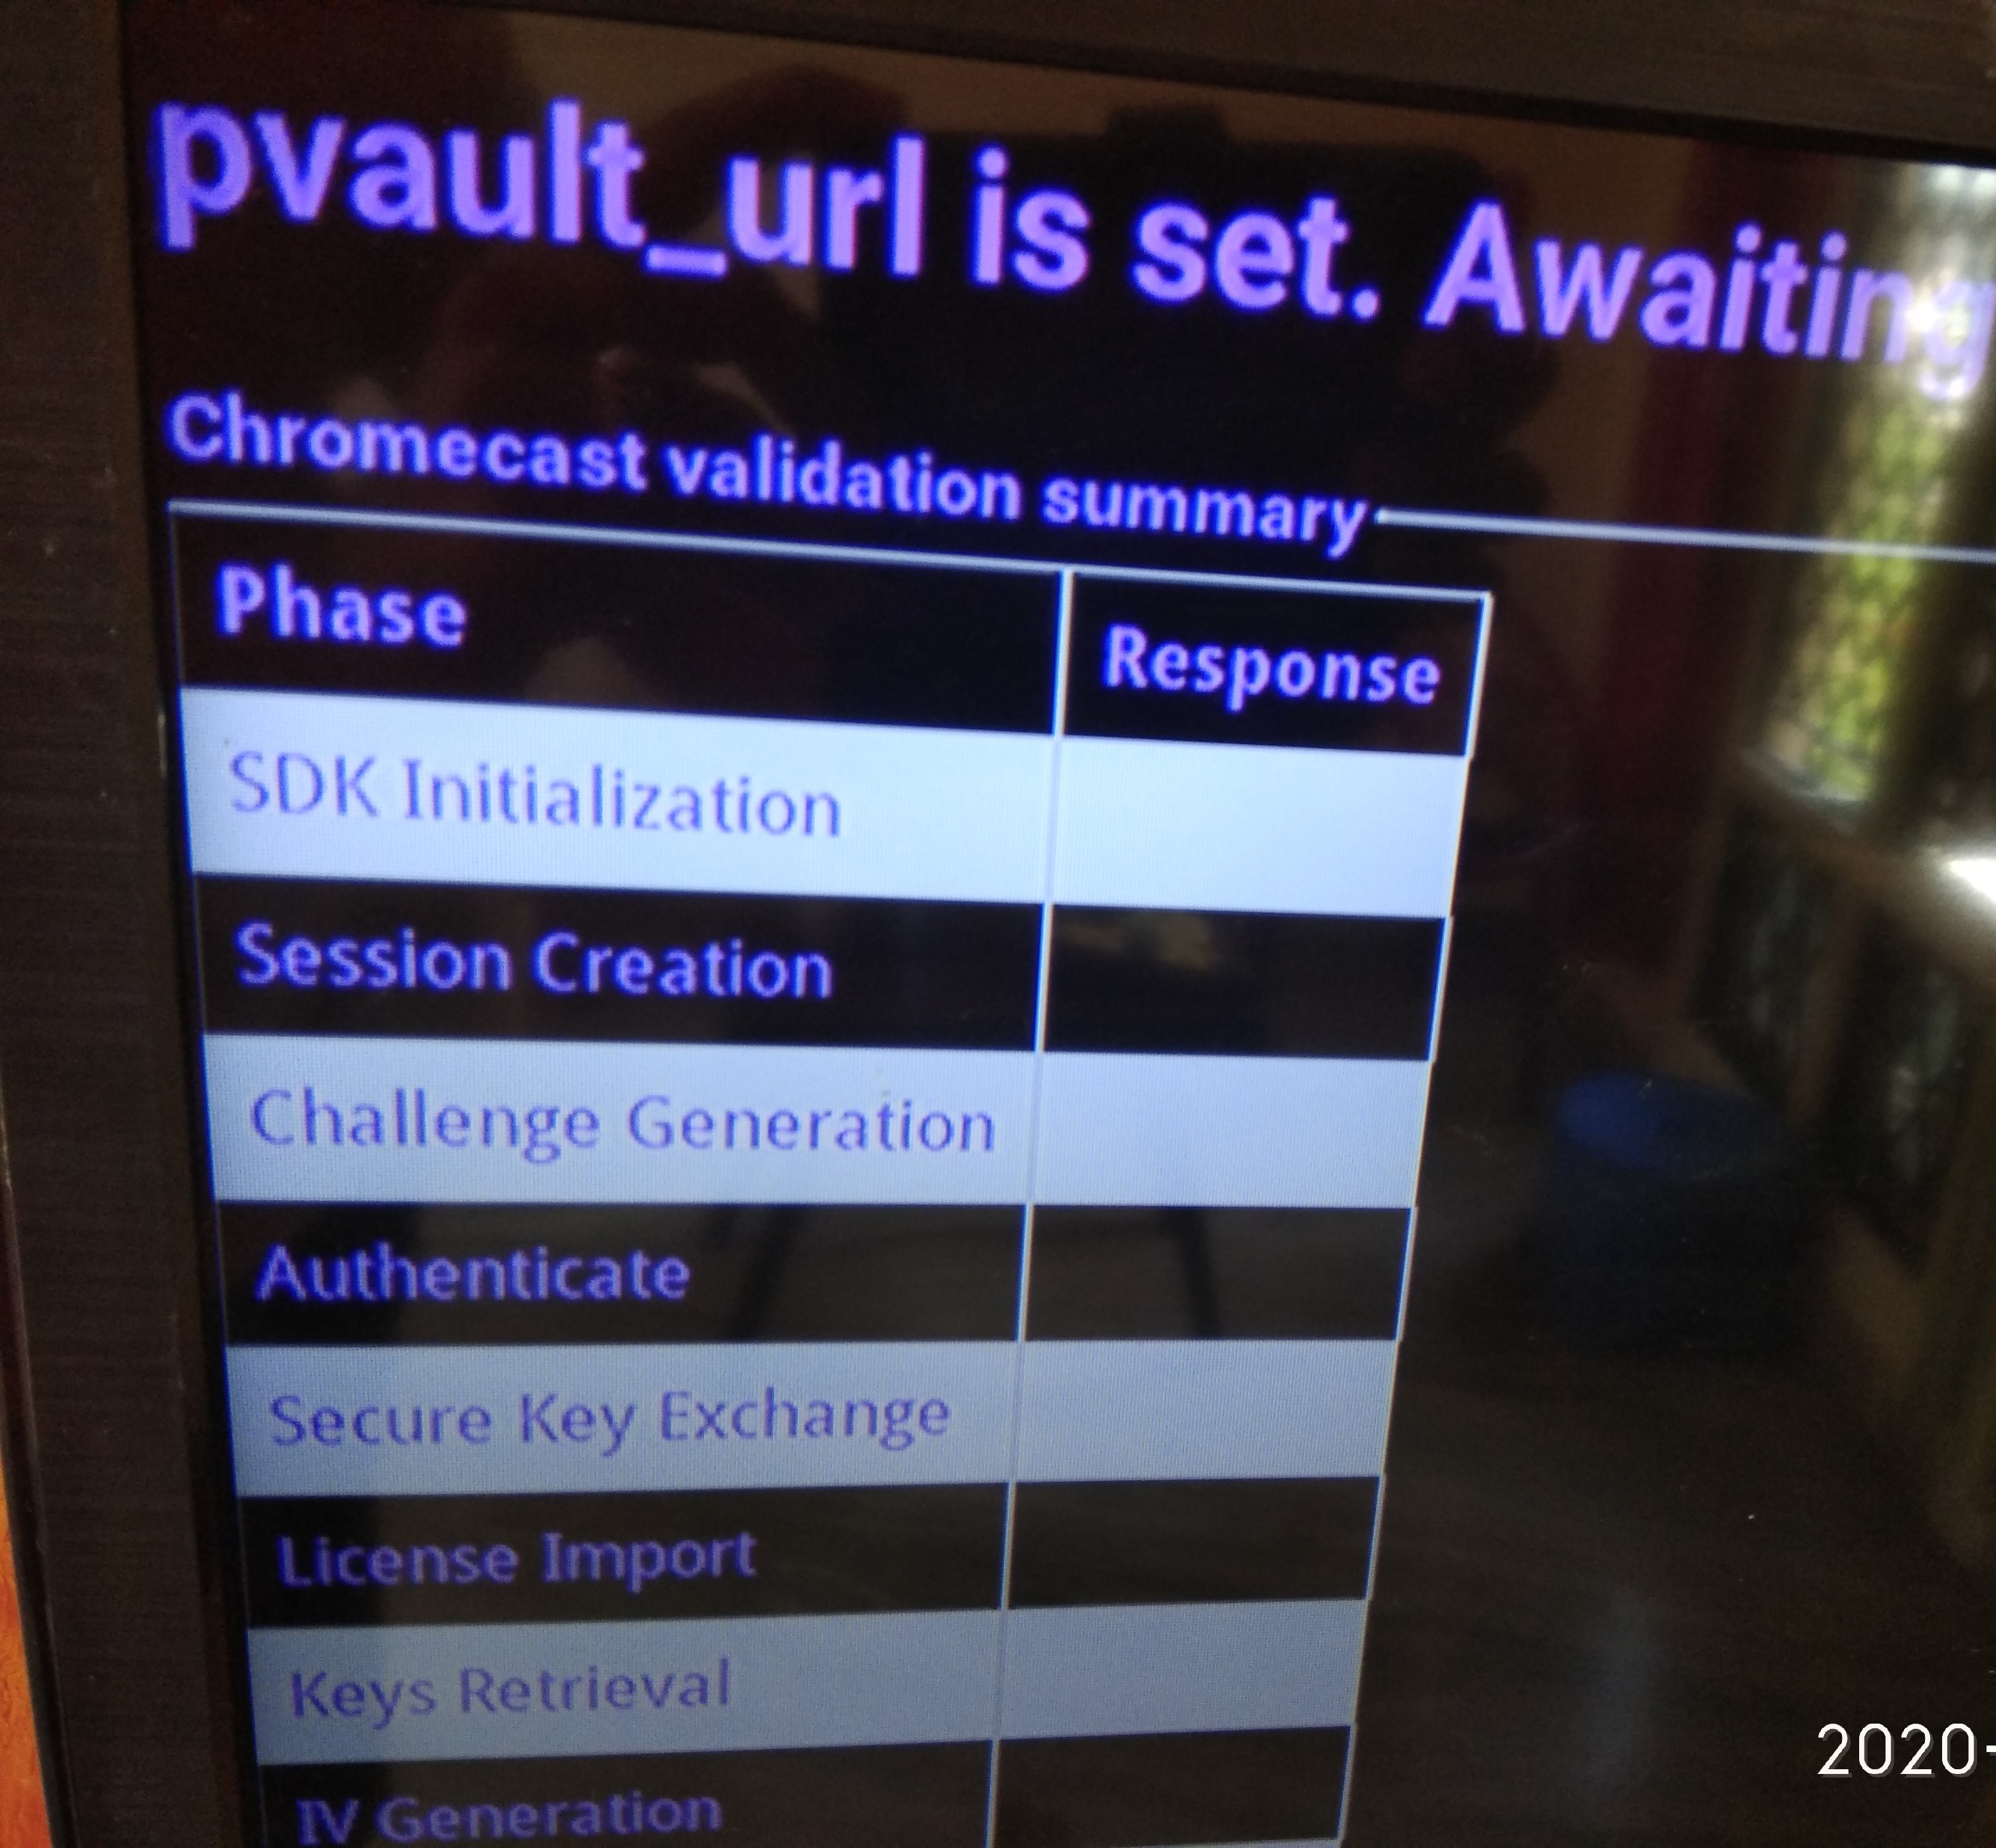
Once the application loads and is visible on the TV screen, the application will wait for the sender's input parameters (auth token, base url and opvault_url).
Whenever the application receives an input parameter from the sender, it will display the appropriate message (depending on the parameter received).
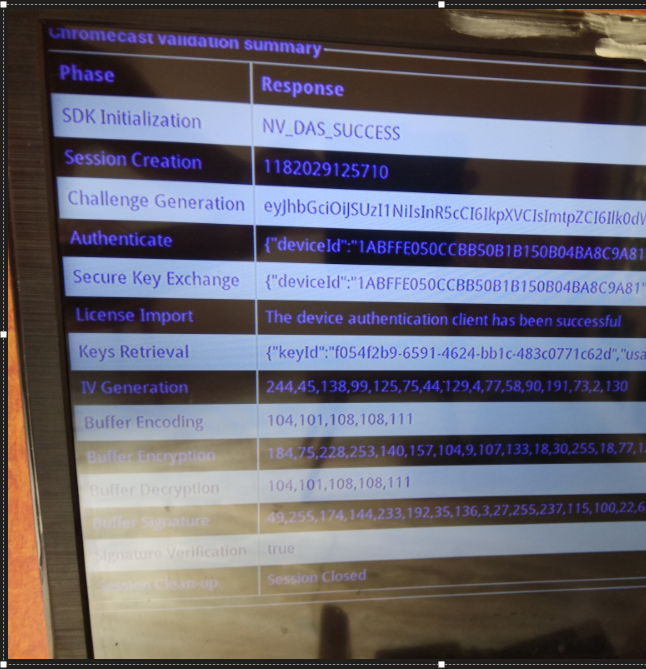
Once the application receives all the expected parameters, the core functionality is triggered. The responses for each phase are displayed on-screen.